
Authorizing and Unauthorizing a DHCP Server
Remember, a DHCP server have to be authorized first before the DHCP server can lease out the IP address. The reason for this is because it prevent any rogue DHCP server from giving out IP address to the client on the network thus giving the intruder access to all client computers.

Authorizing:
1. Click Start > Administrative Tools > DHCP.
2. In DHCP screen, right-click the DHCP server and select Authorize.
NOTE: The way that you can tell that a DHCP server is not authorize is to the right of the DHCP server there is a red down arrow. Once the DHCP server have been Authorize, the red down arrow will turn green up arrow.
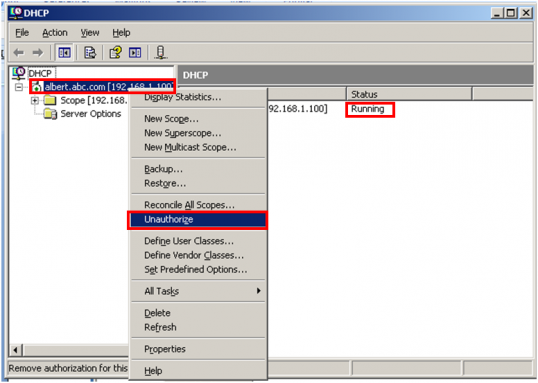
Unauthorizing:
NOTE: You know that the server have been authorized when to the left of the server there is a circle with a down red arrow
- Click Start > Administrative Tools > DHCP.
- In the DHCP Console, select the server that you want to authorize.
- Right-click the server and select UnAuthorize.
NOTE: You know that the server have been authorized when to the left of the server there is a circle with a down red arrow
